Online Manual Actual Keylogger ONLINE (Windows)
1. Download Actual Keylogger ONLINE for Windows.
2. Install the program.
- Step 1. Click on the downloaded file to launch the application. Select “Yes” when prompted by the system.
- Step 2.
Select the language to use during the installation.

- Step 3.
Enter your email to create an online account or to connect to the existing one. Click “Next”.

*If your email is not registered, you’ll be offered to create a password for your online account. Enter and confirm your new password and click “Create”.

- Step 4.
Read the License Agreement, select “I accept the agreement” and press “Next”.

- Step 5.
Click “Install”.

- Step 6.
Click “Finish”.

3. Settings Wizard
After the installation, Actual Keylogger will launch the Settings Wizard. If you do not want to configure any settings, you can click "Skip Wizard". But it is strongly recommended not to skip it and configure the settings. It will take a couple of minutes. Once you open the Wizard, click “Next”.

- Step 1.
Web connection settings. - 1) Make sure that Online monitoring is enabled. If it isn’t, check the box next to "Online monitoring (via any web-browser)" to enable it.

- 2) Make sure that you have entered the valid email address, and click "Next".

- Step 2.
Screenshot Capturing.
Select when the program should make screenshots and their quality. Click “Next”.

- Step 3.
Choose Startup & Hide Options and select users for monitoring. Click “Next”.

- Step 4.
If you want to prevent access to inappropriate websites or pages, check the box and select the necessary options.

- Step 5.
Select social networks and IMs for monitoring and click “Done”.

4. Register the license in the program.
- Step 1.
Open the program and click “About”.

- Step 2.
Select “Enter license activation code”.

- Step 3.
Enter the license code that you received after the purchase in the appropriate fields. For example:

Click “Registration”.
5. Register the license on the dashboard.
- Step 1.
Enter the online dashboard, click your email in the top right corner of the screen and select "Account" in the drop-down menu.

- Step 2.
Enter your license type and license code and click "Register".

6. Register the license on the dashboard.
6.1 Set Email Log Delivery via Actual Keylogger
- Step 1.
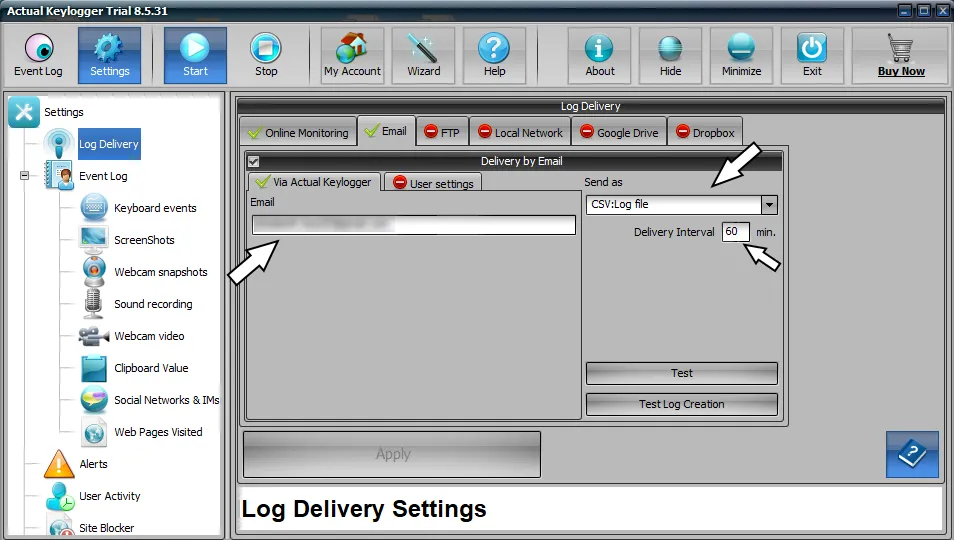
Open Actual Keylogger > Settings > tap Log Delivery on the left menu. Choose the Email tab and place a tick near Delivery by Email.

- Step 2.
In the "Via Actual Keylogger" window, enter your Email, select delivery interval, and in what form you want to receive logs (CSV is selected by default).
- Step 3.
Click "Apply" and "Test".

- If you’ve done everything correctly, you will see a message about the successful sending of a test message to your email.

6.2 Set Email Log Delivery via your mail service.
- It is also possible to send data to email via your mail service. Open the "User settings" tab. Enter your email, SMTP/Port, User Name, and Password in the corresponding fields. Then click "Apply" and "Test".

- If you’ve done everything correctly, you will see a message about the successful sending of a test message to your email.
6.3 Set FTP Log Delivery
- Step 1. Open Actual Keylogger > Settings > tap Log Delivery on the left menu. Choose the FTP tab and place a tick near Delivery by FTP.

- Step 2. Enter FTP server, Remote FTP Folder, User Name, and Password in the fields.
- Step 3. Click "Apply" and "Test". If you’ve done everything correctly, you will see a message about the successful sending of a test message to your folder via FTP.
6.4 Set sending logs via Local Network.
- Step 1. Open Actual Keylogger > Settings > tap Log Delivery on the left menu. Choose the Local Network tab and place a tick near Delivery by Local Network.

- Step 2. Enter Shared Folder, User Name, and Password in the corresponding fields.
- Step 3. Click "Apply" and "Test". If you’ve done everything correctly, you will see a message about the successful sending of a test message to your folder local network.